If you’ve ever browsed Pinterest, you’ve likely seen the live edge resin, and epoxy tables. Some use a clear resin, others glow in the dark, but all of them have one thing in common, they are AWESOME! So naturally, I had to build one for the tiny house.
After watching several YouTube tutorials, I finally pulled the trigger and sourced a large slab of Black Walnut from a local lumber company for $80.

The scope of the project was to make a standing desk that would match the modern interior design of the tiny house.
I used a grinder to remove the bark and any loose wood, then cut it to my desired size.


I used melamine board from Home Depot to create a mold slightly oversize, and covered it with the red tape shown in the pictures to assist with an easy release from the mold.


The next step was to mix the epoxy and color dye together. I had chosen to go with either white or black resin. The poll I had conducted on Facebook among my friends had mostly voted for the black table, however I was concerned it would be too dark to show the contrast with the dark Black Walnut wood slab. So I called an audible and switched to white at the last minute.
After mixing the epoxy and dye components together it was time for the first pour. I didn’t want to mess this up, one, because I had put a lot of work into the table at this point and starting over would put me way behind my deadline, and two, because this crap is expensive!


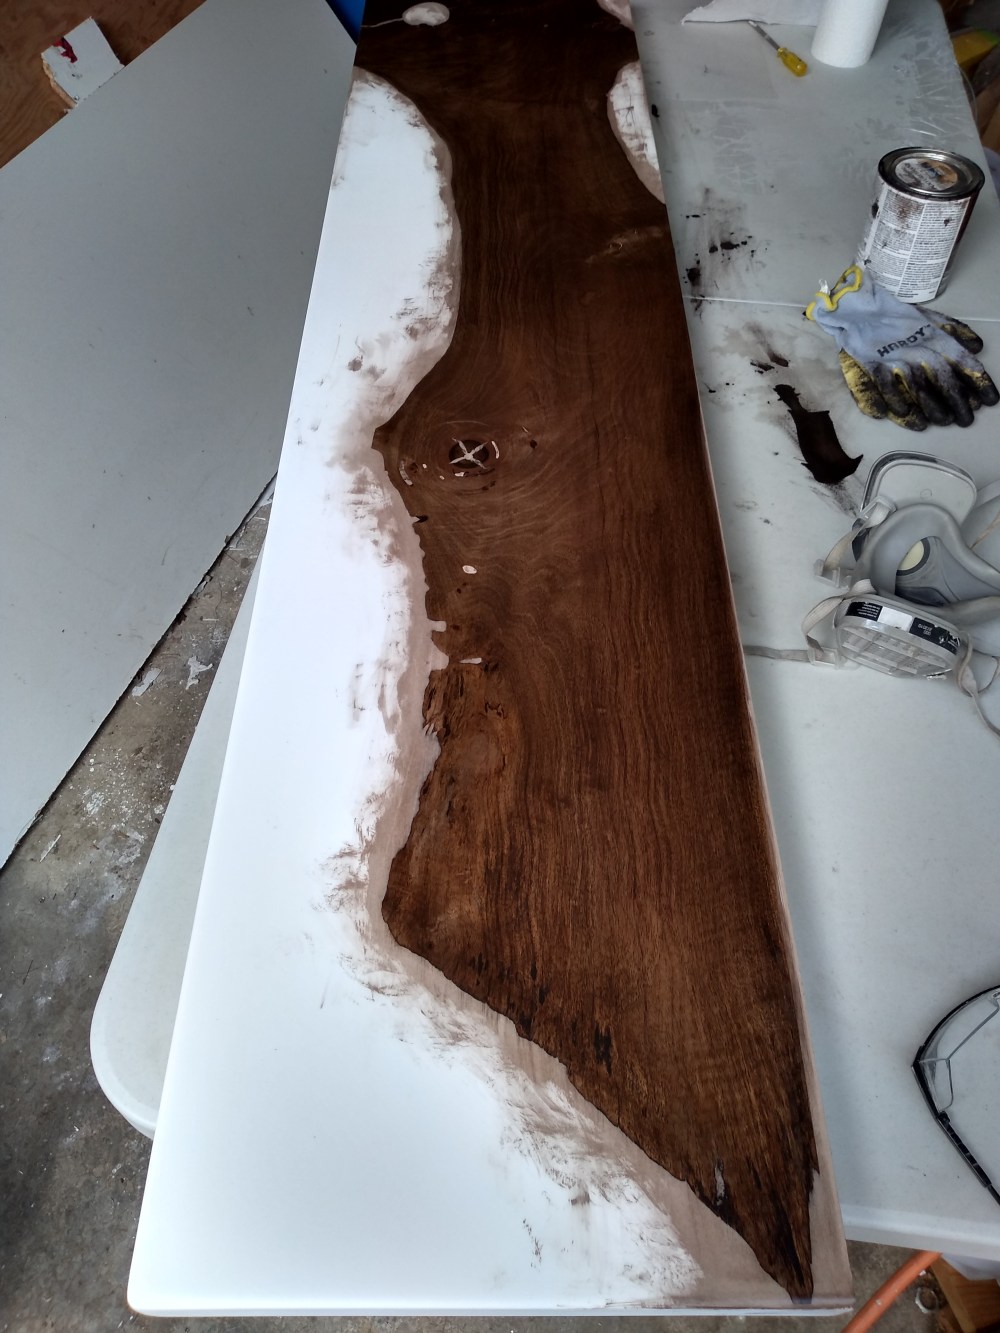
The resin pour filled about half of my mold. After 24 hours of cure time the resin was still squishy, so I opted to give it some more time. The following day it was hard but I could still indent it with my fingernail, which was the perfect density for my second pour of epoxy. Then I used a syringe to squirt epoxy in any small gaps not covered by the pour.


I gave it a few days to cure, then used a pry tool to remove it from the mold. I had tried to order some mold release online, but unfortunately they sent me the wrong item, twice. So I drove on without it. This just made it much more difficult to get my casting out of the mold.
Once I had it pried loose, I took it to a local wood shop in Portland with an industrial sanding machine. They charge $150 per hour for the use of their machine and one of their employees to assist. By assist I mean, that they do all the work for you. When the table thickness looked good, they cleaned up the edges for me on their huge table saw, and I was on my way. They were done in 45 minutes, which cost me $115 but saved me countless hours of time.


With the rough sanding complete on my table I needed to start building some legs so I stopped at a local steel yard to source some raw materials, then welded them together. I attached some old mouse pads to the bottoms of the feet to avoid them scratching the wooden floors I had installed in the tiny house.


I routed the edges of the table, and completed the finish sanding with an orbital sander of various grits ranging from 320 up to 600. Then I used a drill, epoxy, and tap kit to install 5/16 threaded inserts into the bottom of the table for attaching the legs and wall supports (see parts list at bottom of page).
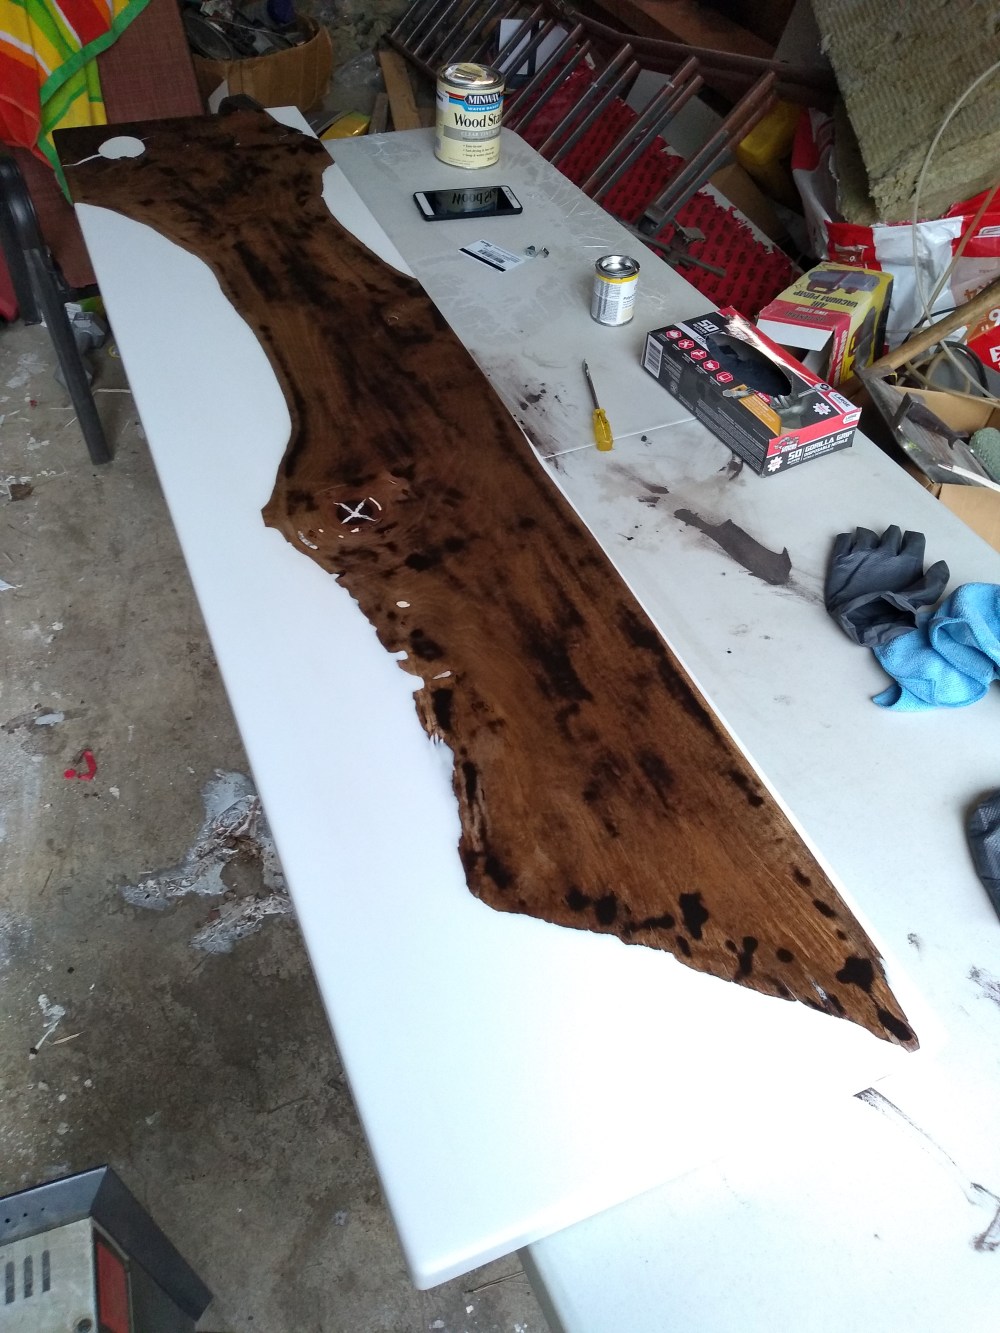
At this point the wood was still way lighter than I was looking for as I had stained everything else in the house a dark Kona brown. I attempted to stain the wood as well thinking it wouldn’t be absorbed into the white resin. I was incorrect. Rather than being able to just wipe it off, the Kona coloring had stained the white epoxy as well resulting in me sanding it back down and starting again.
After much experimentation, I opted to paint the stain onto the wood to keep it from transferring to the white epoxy when I went to rub it out.


Unable to wipe off the stain without it discoloring the white again, I had to let it dry. To make the wood grain appear again I gave it a light sanding to remove the topmost layer. It wasn’t exactly what I had in mind, but the end result was close enough.
I sealed the top layer with two coats of Osmo. After it dried I attached the table legs, and then attached it to the wall supports with the assistance of my father.

This process was a lot of trial and error. It was my first time taking on a project like this and I made my fair share of mistakes. If you are looking to try making one of these tables I’ll be doing another post on the lessons I learned along the way. I’ve also included a list of the products I used, their associated costs, and the total build cost below.
*The following are affiliate links. Using these links will not add anything to your cost of the product, however it will give me a commission for the referral should you decide to purchase something. So if you received some value from this post, using the links is appreciated. 🙂


See this table inside the completed tiny house here.
You can watch the tiny house build video below.
